最近要弄安卓的结课设计,里面刚好有要用WebSocket实现一个简易聊天室的选题,正好之前学了WebSocket没有总结笔记,因此写篇博客总结一下
工具
环境
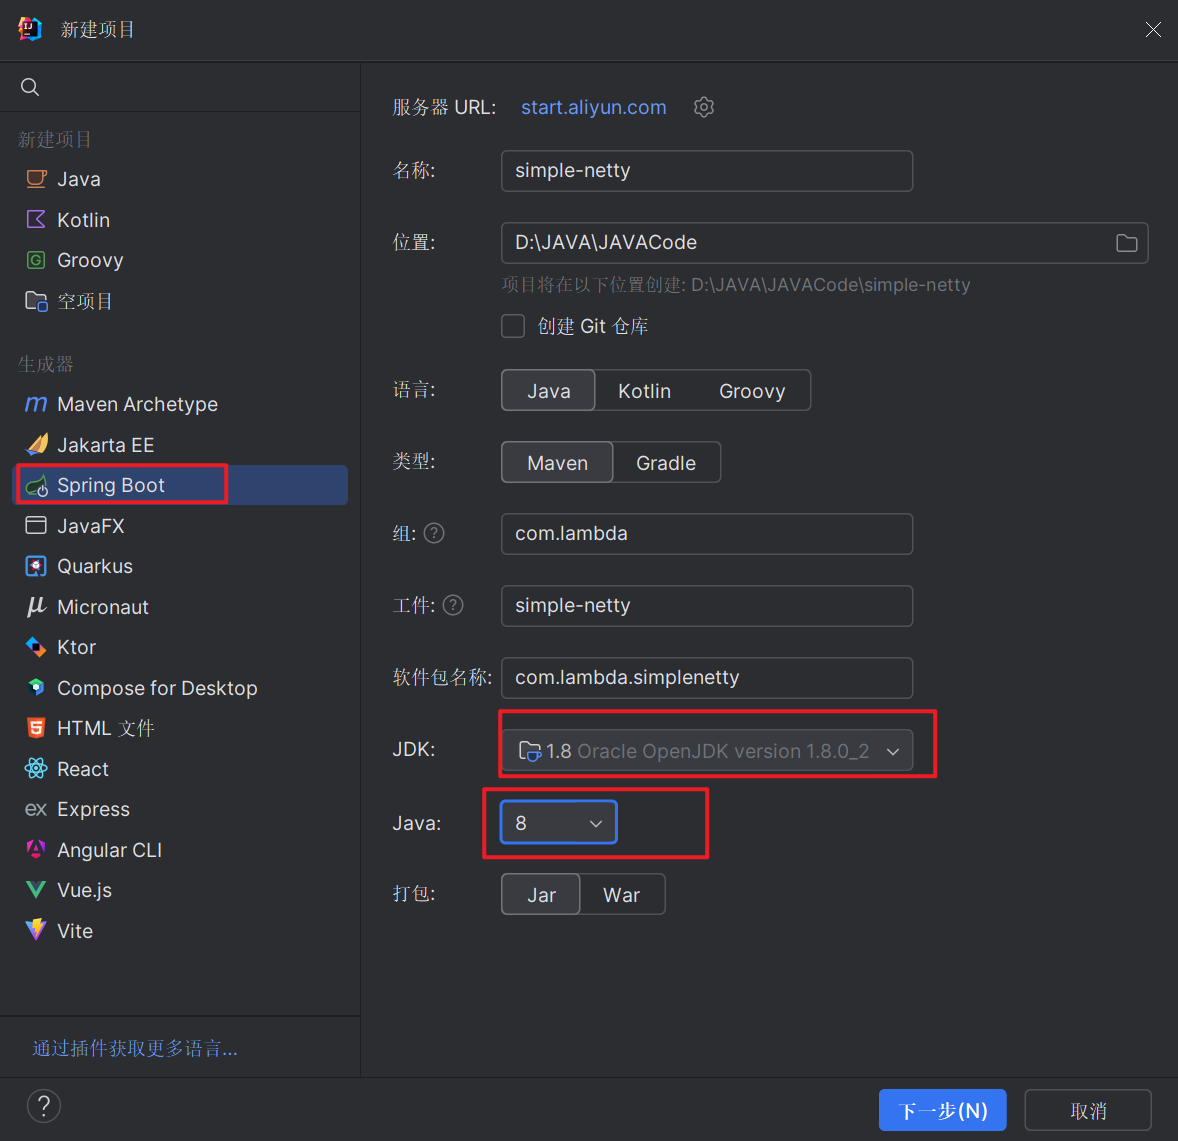
创建项目
名称随意,需要注意只有选择jdk1.8和java8(其他版本如果出现问题请自行解决),点击下一步后的依赖项我们不用管,等下会有我整理好的pom文件

修改Pom文件
如果对pom文件比较熟悉的话,替换掉properties,dependencies就行
1
2
3
4
5
6
7
8
9
10
11
12
13
14
15
16
17
18
19
20
21
22
23
24
25
26
27
28
29
30
31
32
33
34
35
36
| <properties>
<java.version>1.8</java.version>
<project.build.sourceEncoding>UTF-8</project.build.sourceEncoding>
<project.reporting.outputEncoding>UTF-8</project.reporting.outputEncoding>
<spring-boot.version>2.6.3</spring-boot.version>
</properties>
<dependencies>
<dependency>
<groupId>org.springframework.boot</groupId>
<artifactId>spring-boot-starter-web</artifactId>
</dependency>
<dependency>
<groupId>org.springframework.boot</groupId>
<artifactId>spring-boot-starter</artifactId>
</dependency>
<dependency>
<groupId>org.springframework.boot</groupId>
<artifactId>spring-boot-starter-test</artifactId>
<scope>test</scope>
</dependency>
<dependency>
<groupId>cn.hutool</groupId>
<artifactId>hutool-all</artifactId>
<version>5.8.20</version>
</dependency>
<dependency>
<groupId>org.projectlombok</groupId>
<artifactId>lombok</artifactId>
</dependency>
<dependency>
<groupId>io.netty</groupId>
<artifactId>netty-all</artifactId>
</dependency>
</dependencies>
|
如果不熟悉的话就自己全部复制下列文件,复制完后必定会报错,修改artifactId,groupId(如果这几个都不会改的话,那么请先去学SpringBoot)
1
2
3
4
5
6
7
8
9
10
11
12
13
14
15
16
17
18
19
20
21
22
23
24
25
26
27
28
29
30
31
32
33
34
35
36
37
38
39
40
41
42
43
44
45
46
47
48
49
50
51
52
53
54
55
56
57
58
59
| <?xml version="1.0" encoding="UTF-8"?>
<project xmlns="http://maven.apache.org/POM/4.0.0" xmlns:xsi="http://www.w3.org/2001/XMLSchema-instance"
xsi:schemaLocation="http://maven.apache.org/POM/4.0.0 https://maven.apache.org/xsd/maven-4.0.0.xsd">
<modelVersion>4.0.0</modelVersion>
<groupId>com.lambda</groupId>
<artifactId>simple-netty</artifactId>
<version>0.0.1-SNAPSHOT</version>
<name>simple-netty</name>
<description>simple-netty</description>
<properties>
<java.version>1.8</java.version>
<project.build.sourceEncoding>UTF-8</project.build.sourceEncoding>
<project.reporting.outputEncoding>UTF-8</project.reporting.outputEncoding>
<spring-boot.version>2.6.3</spring-boot.version>
</properties>
<dependencies>
<dependency>
<groupId>org.springframework.boot</groupId>
<artifactId>spring-boot-starter-web</artifactId>
</dependency>
<dependency>
<groupId>org.springframework.boot</groupId>
<artifactId>spring-boot-starter</artifactId>
</dependency>
<dependency>
<groupId>org.springframework.boot</groupId>
<artifactId>spring-boot-starter-test</artifactId>
<scope>test</scope>
</dependency>
<dependency>
<groupId>cn.hutool</groupId>
<artifactId>hutool-all</artifactId>
<version>5.8.20</version>
</dependency>
<dependency>
<groupId>org.projectlombok</groupId>
<artifactId>lombok</artifactId>
</dependency>
<dependency>
<groupId>io.netty</groupId>
<artifactId>netty-all</artifactId>
</dependency>
</dependencies>
<dependencyManagement>
<dependencies>
<dependency>
<groupId>org.springframework.boot</groupId>
<artifactId>spring-boot-dependencies</artifactId>
<version>${spring-boot.version}</version>
<type>pom</type>
<scope>import</scope>
</dependency>
</dependencies>
</dependencyManagement>
</project>
|
创建WebSocket服务
这个类是我们WebSocket的主要服务类,首先创建包websocket,然后创建类NettyWebSocketServer(博主这里完整的路径为com.lambda.simplenetty.websocket.NettyWebSocketServer)
1
2
3
4
5
6
7
8
9
10
11
12
13
14
15
16
17
18
19
20
21
22
23
24
25
26
27
28
29
30
31
32
33
34
35
36
37
38
39
40
41
42
43
44
45
46
47
48
49
50
51
52
53
54
55
56
57
58
59
60
61
62
63
64
65
66
67
68
69
70
71
72
73
74
75
76
77
78
79
80
81
82
83
84
85
86
87
88
89
90
91
92
93
94
95
96
97
98
99
100
101
102
103
104
105
106
107
108
109
110
111
112
113
114
| package com.lambda.simplenetty.websocket;
import io.netty.bootstrap.ServerBootstrap;
import io.netty.channel.ChannelInitializer;
import io.netty.channel.ChannelOption;
import io.netty.channel.ChannelPipeline;
import io.netty.channel.EventLoopGroup;
import io.netty.channel.nio.NioEventLoopGroup;
import io.netty.channel.socket.SocketChannel;
import io.netty.channel.socket.nio.NioServerSocketChannel;
import io.netty.handler.codec.http.HttpObjectAggregator;
import io.netty.handler.codec.http.HttpServerCodec;
import io.netty.handler.codec.http.websocketx.WebSocketServerProtocolHandler;
import io.netty.handler.logging.LogLevel;
import io.netty.handler.logging.LoggingHandler;
import io.netty.handler.stream.ChunkedWriteHandler;
import io.netty.util.NettyRuntime;
import io.netty.util.concurrent.Future;
import lombok.extern.slf4j.Slf4j;
import org.springframework.beans.factory.annotation.Value;
import org.springframework.context.annotation.Configuration;
import javax.annotation.PostConstruct;
import javax.annotation.PreDestroy;
@Slf4j
@Configuration
public class NettyWebSocketServer {
public Integer port = 8090;
private final EventLoopGroup bossGroup = new NioEventLoopGroup(1);
private final EventLoopGroup workerGroup = new NioEventLoopGroup(NettyRuntime.availableProcessors());
@PostConstruct
public void start() throws InterruptedException {
this.run();
}
@PreDestroy
public void destroy() {
Future<?> future = this.bossGroup.shutdownGracefully();
Future<?> future1 = this.workerGroup.shutdownGracefully();
future.syncUninterruptibly();
future1.syncUninterruptibly();
log.info("关闭 ws server 成功");
}
public void run() throws InterruptedException {
ServerBootstrap serverBootstrap = new ServerBootstrap();
serverBootstrap.group(this.bossGroup, this.workerGroup)
.channel(NioServerSocketChannel.class)
.option(ChannelOption.SO_BACKLOG, 128)
.option(ChannelOption.SO_KEEPALIVE, true)
.handler(new LoggingHandler(LogLevel.INFO))
.childHandler(new ChannelInitializer<SocketChannel>() {
@Override
protected void initChannel(SocketChannel socketChannel) throws Exception {
ChannelPipeline pipeline = socketChannel.pipeline();
pipeline.addLast(new HttpServerCodec());
pipeline.addLast(new ChunkedWriteHandler());
pipeline.addLast(new HttpObjectAggregator(8192));
pipeline.addLast(new WebSocketServerProtocolHandler("/"));
pipeline.addLast(nettyWebSocketServerHandler);
pipeline.addLast(nettyGlobalExceptionHandler);
}
});
serverBootstrap.bind(this.port).sync();
}
}
|
代码解释
1
| public Integer port = 8090;
|
这个是定义的websocket的启动端口,我们连接websocket时需要指明该端口号(比如该websocket连接字符串,ws://127.0.0.1:8090/,这里127.0.0.1为ip地址,8090为端口号)
1
2
3
4
5
6
7
8
9
10
|
@PostConstruct
public void start() throws InterruptedException {
this.run();
}
|
@PostConstruct是SpringBoot中的一个注解,主要功能是在依赖注入完成后执行对应的逻辑,因此这里就是在初始化完成后运行websocket
1
2
3
4
5
6
7
8
9
10
11
|
@PreDestroy
public void destroy() {
Future<?> future = this.bossGroup.shutdownGracefully();
Future<?> future1 = this.workerGroup.shutdownGracefully();
future.syncUninterruptibly();
future1.syncUninterruptibly();
log.info("关闭 ws server 成功");
}
|
@PreDestroy是SpringBoot中的一个注解,用于在Spring Bean销毁之前执行一些清理或资源释放的操作,因此这里就是在消耗时释放下内存
1
2
3
4
5
6
7
8
9
10
11
12
13
14
15
16
17
18
19
20
21
22
23
24
25
26
27
28
29
30
31
32
33
34
35
36
37
38
39
40
|
public void run() throws InterruptedException {
ServerBootstrap serverBootstrap = new ServerBootstrap();
serverBootstrap.group(this.bossGroup, this.workerGroup)
.channel(NioServerSocketChannel.class)
.option(ChannelOption.SO_BACKLOG, 128)
.option(ChannelOption.SO_KEEPALIVE, true)
.handler(new LoggingHandler(LogLevel.INFO))
.childHandler(new ChannelInitializer<SocketChannel>() {
@Override
protected void initChannel(SocketChannel socketChannel) throws Exception {
ChannelPipeline pipeline = socketChannel.pipeline();
pipeline.addLast(new HttpServerCodec());
pipeline.addLast(new ChunkedWriteHandler());
pipeline.addLast(new HttpObjectAggregator(8192));
pipeline.addLast(new WebSocketServerProtocolHandler("/"));
}
});
serverBootstrap.bind(this.port).sync();
}
|
(这部分是最重要的代码,也是最难的部分,如果不懂的话就直接cv吧)
- 创建服务器引导对象
1
| ServerBootstrap serverBootstrap = new ServerBootstrap();
|
ServerBootstrap:Netty 用于启动服务器的引导类,封装了服务器配置的基本操作。
- 配置线程组
1
| serverBootstrap.group(this.bossGroup, this.workerGroup)
|
bossGroup:接收客户端连接的线程组,负责监听端口和接收连接。workerGroup:处理已建立连接的 I/O 读写线程组。
- 指定通道类型
1
| .channel(NioServerSocketChannel.class)
|
NioServerSocketChannel:指定使用 NIO(非阻塞 I/O)类型的通道,用于接收客户端连接。
- 设置服务器选项
1
| .option(ChannelOption.SO_KEEPALIVE, true)
|
SO_BACKLOG:指定服务器可同时处理的最大连接数。SO_KEEPALIVE:启用 TCP 保活机制,检测连接是否有效,保持长时间的连接。
- 添加日志处理器
1
| .handler(new LoggingHandler(LogLevel.INFO))
|
LoggingHandler:为 bossGroup 添加日志处理器,记录服务器接收连接的日志,日志级别为 INFO。
- 初始化子通道处理器
1
2
3
4
| .childHandler(new ChannelInitializer<SocketChannel>() {
@Override
protected void initChannel(SocketChannel socketChannel) throws Exception {
ChannelPipeline pipeline = socketChannel.pipeline();
|
childHandler:为每个连接的 Channel 设置初始化器 ChannelInitializer。ChannelPipeline:Netty 的处理链,包含多个 ChannelHandler,每个处理器完成不同任务。
- HTTP 编解码器
1
| pipeline.addLast(new HttpServerCodec());
|
HttpServerCodec:Netty 提供的 HTTP 请求解码器和响应编码器,处理 HTTP 协议的请求和响应。
- ChunkedWriteHandler
1
| pipeline.addLast(new ChunkedWriteHandler());
|
ChunkedWriteHandler:处理大块数据的写操作,支持分块发送数据,避免内存占用过高。
- HttpObjectAggregator
1
| pipeline.addLast(new HttpObjectAggregator(8192));
|
HttpObjectAggregator:将多个 HTTP 消息段聚合为一个完整的 HTTP 请求或响应,最大聚合数据为 8192 字节。- 解决了 HTTP 请求分段传输的问题(例如大型 POST 请求)。
- WebSocket 协议升级处理器
1
| pipeline.addLast(new WebSocketServerProtocolHandler("/"));
|
WebSocketServerProtocolHandler
1
2
3
4
5
6
7
8
9
10
11
12
13
14
15
16
17
18
19
20
21
22
23
24
25
26
27
28
29
30
31
32
33
34
35
36
37
38
39
40
41
42
43
44
45
46
47
48
49
50
51
52
53
54
55
56
57
58
59
60
61
62
63
64
65
66
67
68
69
70
71
72
73
74
75
76
77
78
79
80
81
82
83
84
85
86
87
88
89
90
91
92
93
94
|
:
- 将 HTTP 升级为 WebSocket 协议,处理握手和控制帧。
- URI 为 `/`,即处理 WebSocket 请求时使用 `ws://localhost:port/`。
- 使用状态码 `101` 表示协议切换成功。
## 创建自定义处理器
在`websocket`包下创建包`handler`,然后创建类`NettyWebSocketServerHandler`(博主这里完整的路径为:`com.lambda.simplenetty.websocket.handler.NettyWebSocketServerHandler`)
```java
package com.lambda.simplenetty.websocket.handler;
import io.netty.channel.ChannelHandler.Sharable;
import io.netty.channel.ChannelHandlerContext;
import io.netty.channel.SimpleChannelInboundHandler;
import io.netty.handler.codec.http.websocketx.TextWebSocketFrame;
import io.netty.handler.timeout.IdleState;
import io.netty.handler.timeout.IdleStateEvent;
import lombok.extern.slf4j.Slf4j;
@Slf4j
@Sharable
public class NettyWebSocketServerHandler extends SimpleChannelInboundHandler<TextWebSocketFrame> {
@Override
public void handlerAdded(ChannelHandlerContext ctx) {
}
@Override
public void handlerRemoved(ChannelHandlerContext ctx) {
log.warn("触发 handlerRemoved 掉线![{}]", ctx.channel().id());
}
@Override
public void channelInactive(ChannelHandlerContext ctx) {
log.warn("触发 channelInactive 掉线![{}]", ctx.channel().id());
}
@Override
public void userEventTriggered(ChannelHandlerContext ctx, Object evt) throws Exception {
if (evt instanceof IdleStateEvent) {
IdleStateEvent idleStateEvent = (IdleStateEvent) evt;
if (idleStateEvent.state() == IdleState.READER_IDLE) {
log.info("未读取到用户心跳,正在关闭WebSocket连接,channelId:[{}]", ctx.channel().id());
}
}
super.userEventTriggered(ctx, evt);
}
@Override
protected void channelRead0(ChannelHandlerContext ctx, TextWebSocketFrame msg) {
ctx.channel().writeAndFlush(new TextWebSocketFrame(String.format("接收到用户发送来的信息,%s", msg.text())));
}
}
|
这里最重要的为channelRead0方法,我们主要在这个方法中处理客户端发送过来的消息,发送消息我们用
1
| ctx.channel().writeAndFlush(new TextWebSocketFrame("返回的消息"));
|
添加自定义处理器
修改NettyWebSocketServer
1
2
3
4
5
6
7
8
9
10
11
12
13
14
15
16
17
18
19
20
21
22
23
24
25
26
27
28
29
30
31
32
33
34
35
36
37
38
39
40
41
| public void run() throws InterruptedException {
ServerBootstrap serverBootstrap = new ServerBootstrap();
serverBootstrap.group(this.bossGroup, this.workerGroup)
.channel(NioServerSocketChannel.class)
.option(ChannelOption.SO_BACKLOG, 128)
.option(ChannelOption.SO_KEEPALIVE, true)
.handler(new LoggingHandler(LogLevel.INFO))
.childHandler(new ChannelInitializer<SocketChannel>() {
    @Override
    protected void initChannel(SocketChannel socketChannel) throws Exception {
        ChannelPipeline pipeline = socketChannel.pipeline();
pipeline.addLast(new HttpServerCodec());
pipeline.addLast(new ChunkedWriteHandler());
pipeline.addLast(new HttpObjectAggregator(8192));
pipeline.addLast(new WebSocketServerProtocolHandler("/"));
pipeline.addLast(new NettyWebSocketServerHandler());
}
});
serverBootstrap.bind(this.port).sync();
}
|
在pipeline中添加我们刚才创建的NettyWebSocketServerHandler
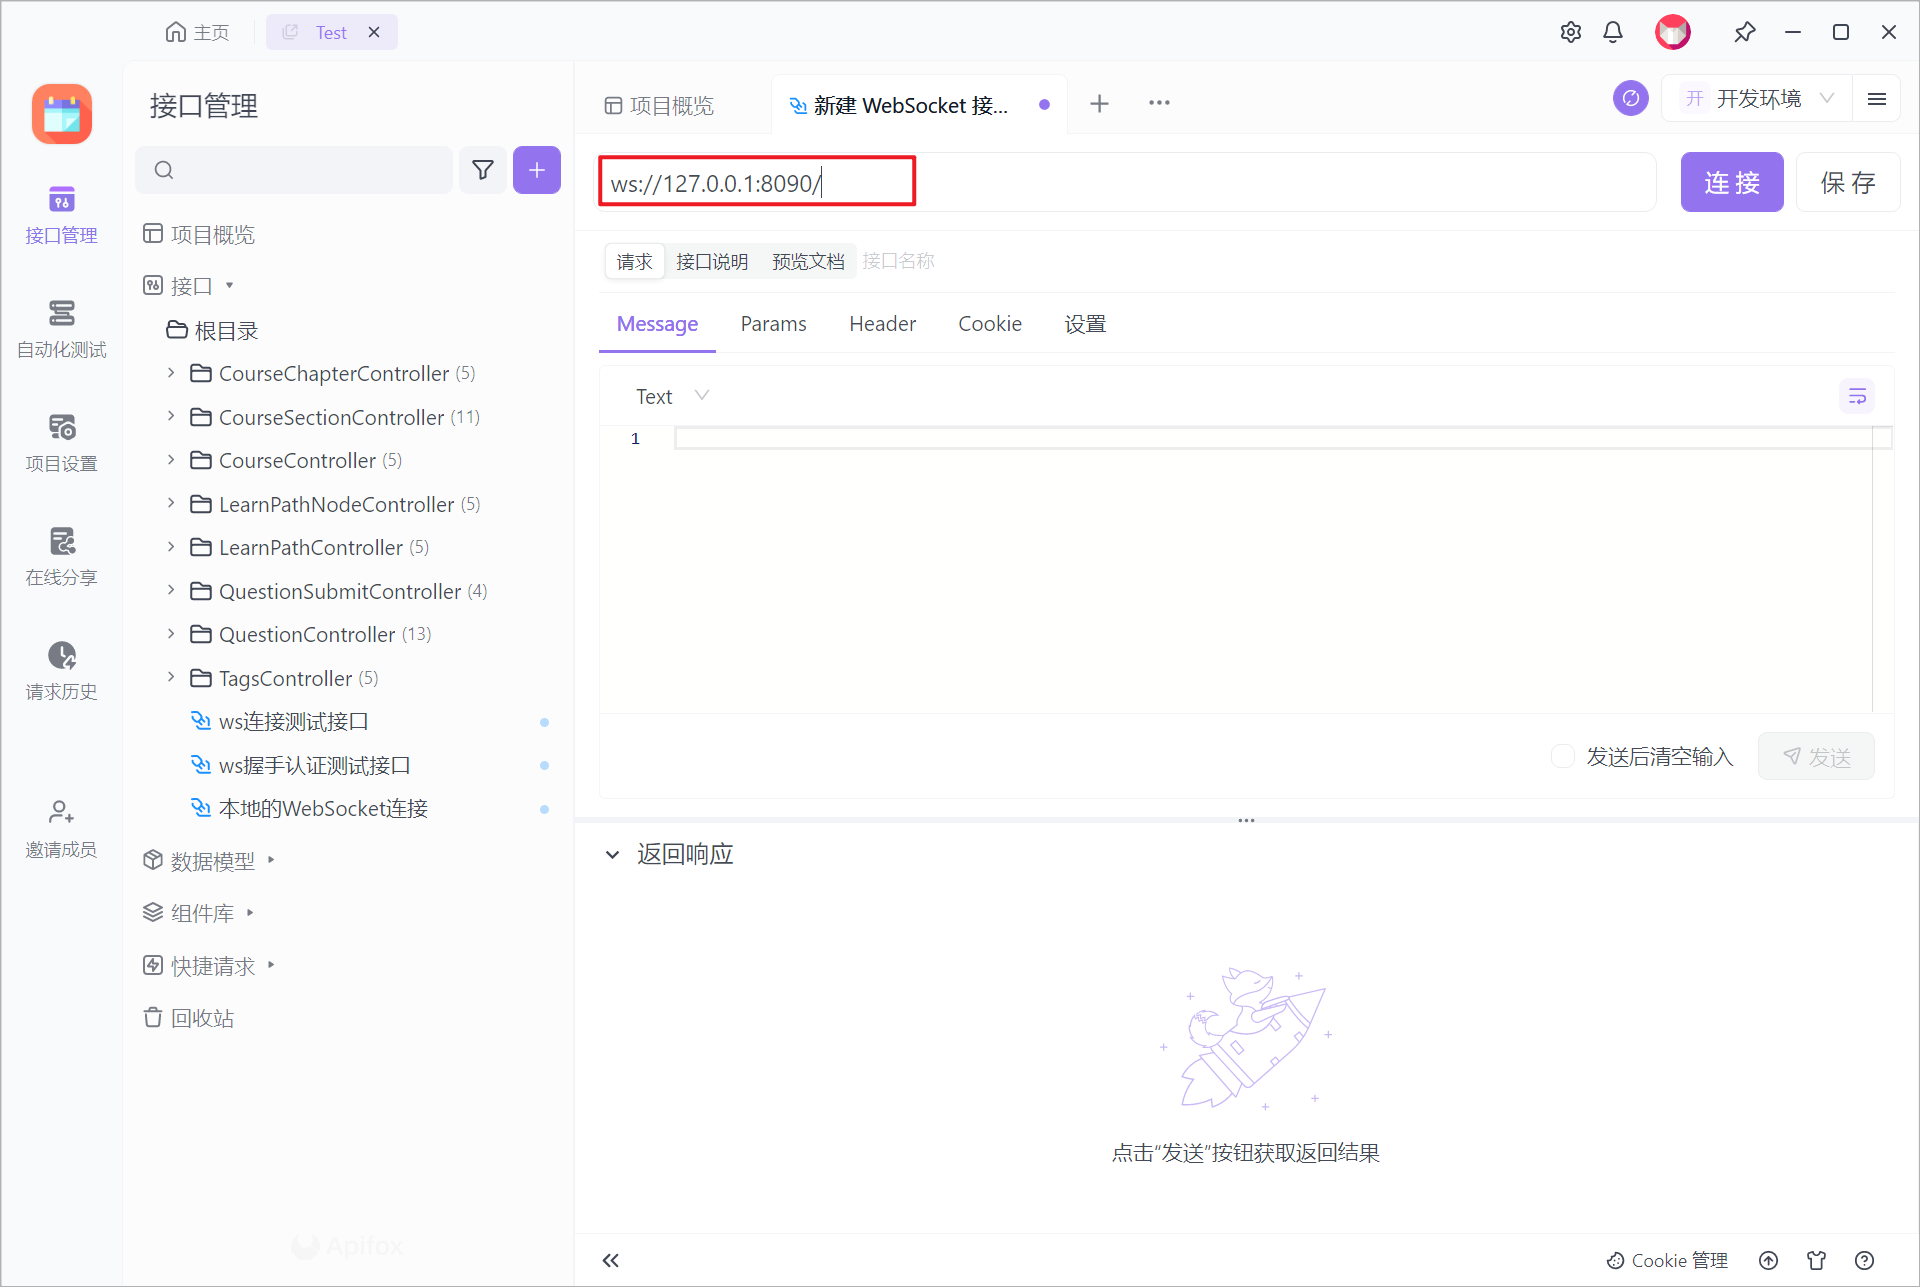
启动服务
接下来我们启动服务,然后打开apifox,新建个websocket接口,然后输入ws://127.0.0.1:8090/,点击连接
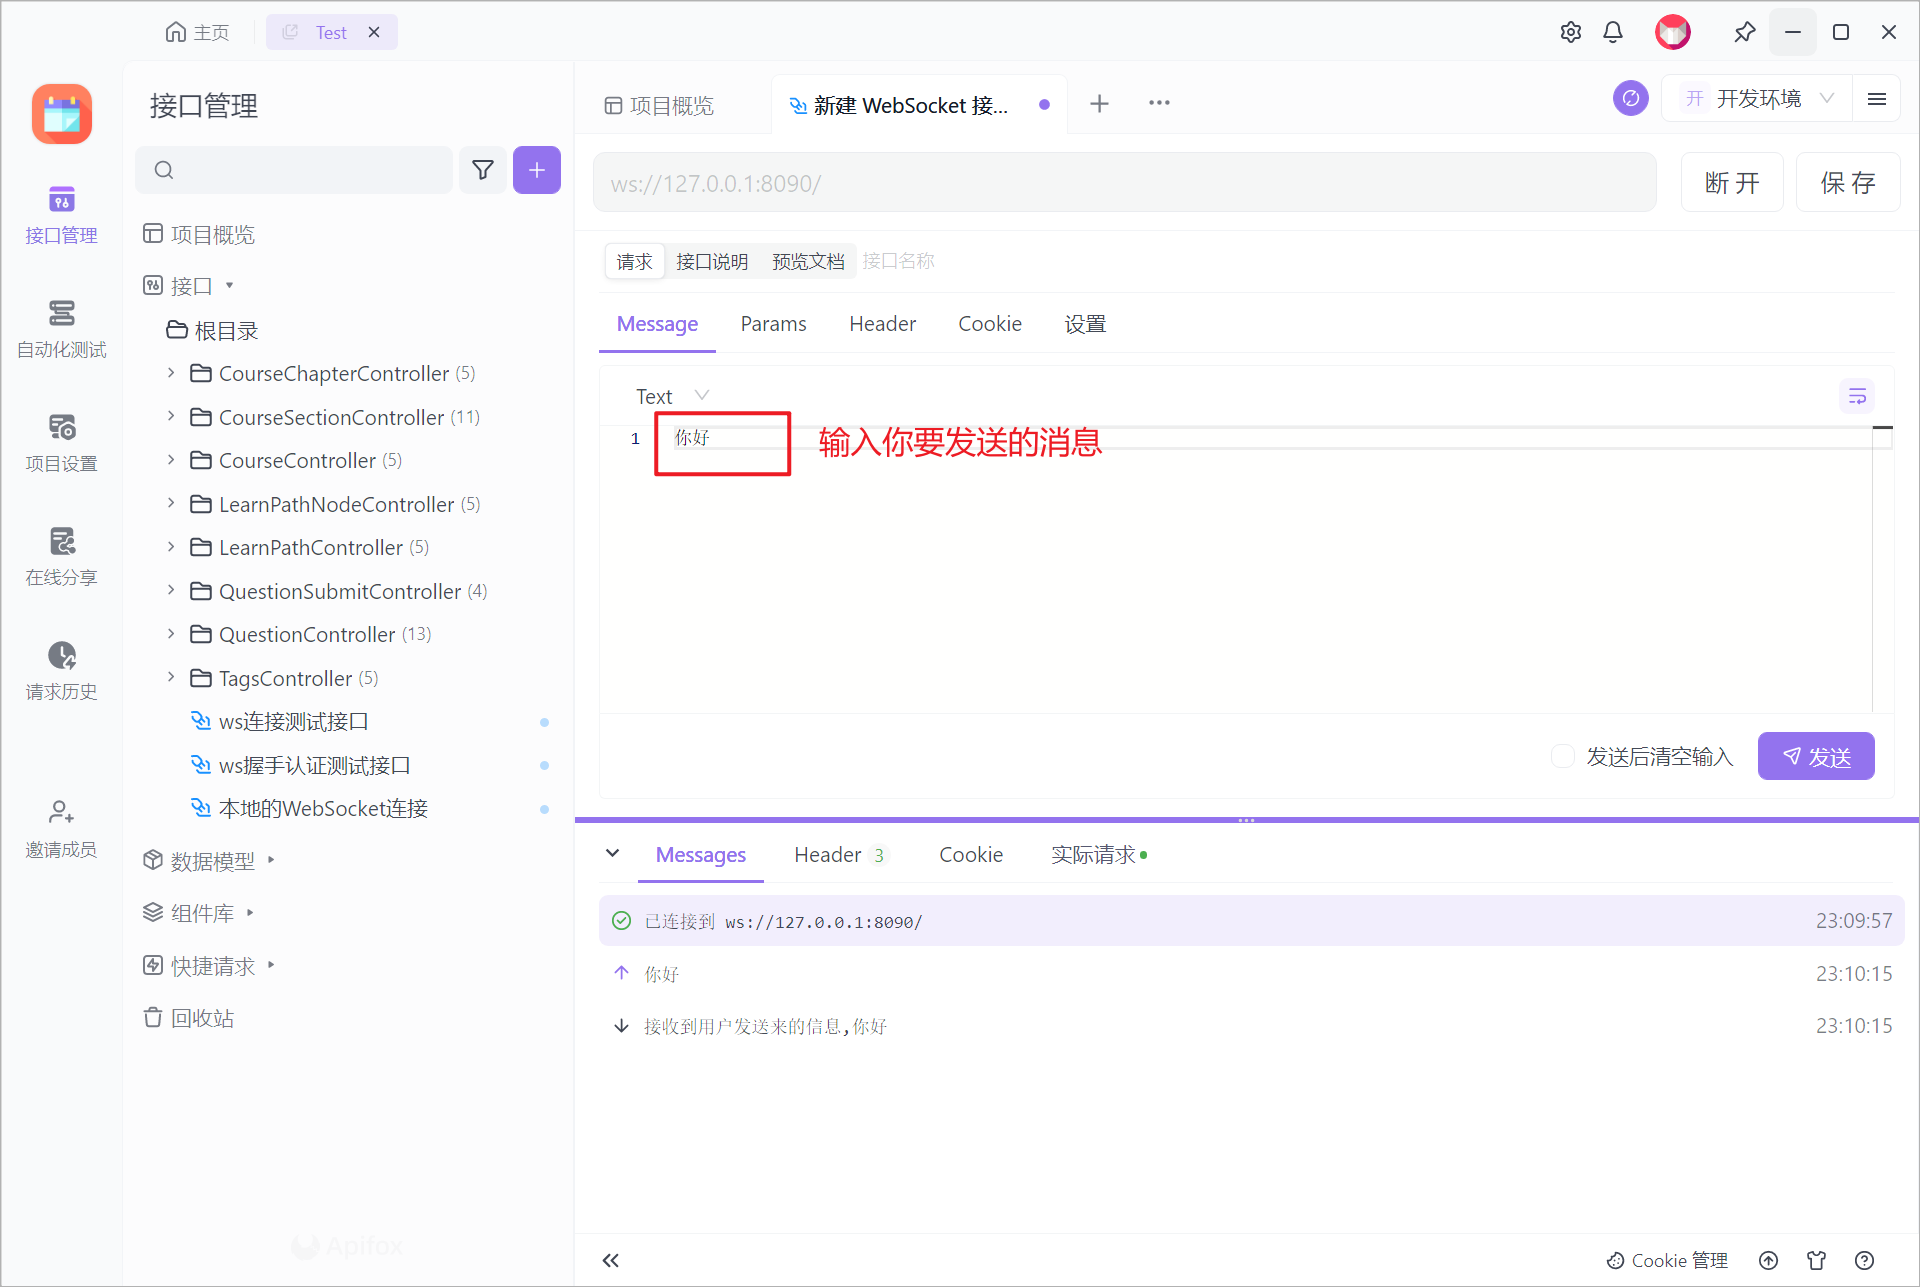
然后输入你要发送的消息,点击发送
至此,应该简单的基于Netty的websocket服务器就搭建完成了